
2022-11-23 375
nginx下载地址
nginx: download
下载后解压,进入bin目录,根据你的系统执行相应的命令
启动
start nginx.exe终止
nginx.exe -s stop //停止nginx
nginx.exe -s reload //重新加载nginx
nginx.exe -s quit //退出nginx
nacos官网网址
Nacos 快速开始
1.复制三份解压后的nacos文件包分别命名如下

2.以nacos8848为例,进入该目录,进入conf目录修改application.properties文件,使用外置数据源
### Default web server port:
server.port=8848

#*************** Network Related Configurations ***************#
### If prefer hostname over ip for Nacos server addresses in cluster.conf:
# nacos.inetutils.prefer-hostname-over-ip=false

### Specify local server's IP:
# nacos.inetutils.ip-address=
#*************** Config Module Related Configurations ***************#
### If use MySQL as datasource:
spring.datasource.platform=mysql
### Count of DB:
db.num=1
### Connect URL of DB:
db.url.0=jdbc:mysql://127.0.0.1:3306/nacos?characterEncoding=utf8&connectTimeout=1000&socketTimeout=3000&autoReconnect=true&useUnicode=true&useSSL=false&serverTimezone=UTC
db.user.0=root
db.password.0=root
3.将conf/cluster.conf.example改为cluster.conf,添加节点配置
#2022-03-23T10:56:12.825
localhost:8849
localhost:8850
4.另外几台也照这个配置修改,注意端口号的修改
创建mysql数据库,sql文件位置:conf\nacosmysql.sql
5.分别启动三台nacos,启动命令为进入到bin目录,cmd执行startup.cmd
startup.cmd6.配置nginx.conf
#user  nobody;
worker_processes  1;

#error_log  logs/error.log;
#error_log  logs/error.log  notice;
#error_log  logs/error.log  info;

#pid        logs/nginx.pid;


events {
    worker_connections  1024;
}


http {
    include       mime.types;
    default_type  application/octet-stream;

    #log_format  main  '$remote_addr - $remote_user [$time_local] "$request" '
    #                  '$status $body_bytes_sent "$http_referer" '
    #                  '"$http_user_agent" "$http_x_forwarded_for"';

    #access_log  logs/access.log  main;

    sendfile        on;
    #tcp_nopush     on;

    #keepalive_timeout  0;
    keepalive_timeout  65;

    #gzip  on;
	upstream nacoscluster {
		server localhost:8848;
		server localhost:8849;
		server localhost:8850;
	}

	   server {
        listen       8847;
        server_name  localhost;


		location /nacos/ {
            proxy_pass http://nacoscluster/nacos/;
        }

        location = /50x.html {
            root   html;
        }
        error_page   500 502 503 504  /50x.html;
    }


    server {
        listen       80;
        server_name  localhost;

        location / {
            root   html;
            index  index.html index.htm;
        }


        error_page   500 502 503 504  /50x.html;
        location = /50x.html {
            root   html;
        }
    }


}
7.执行nginx
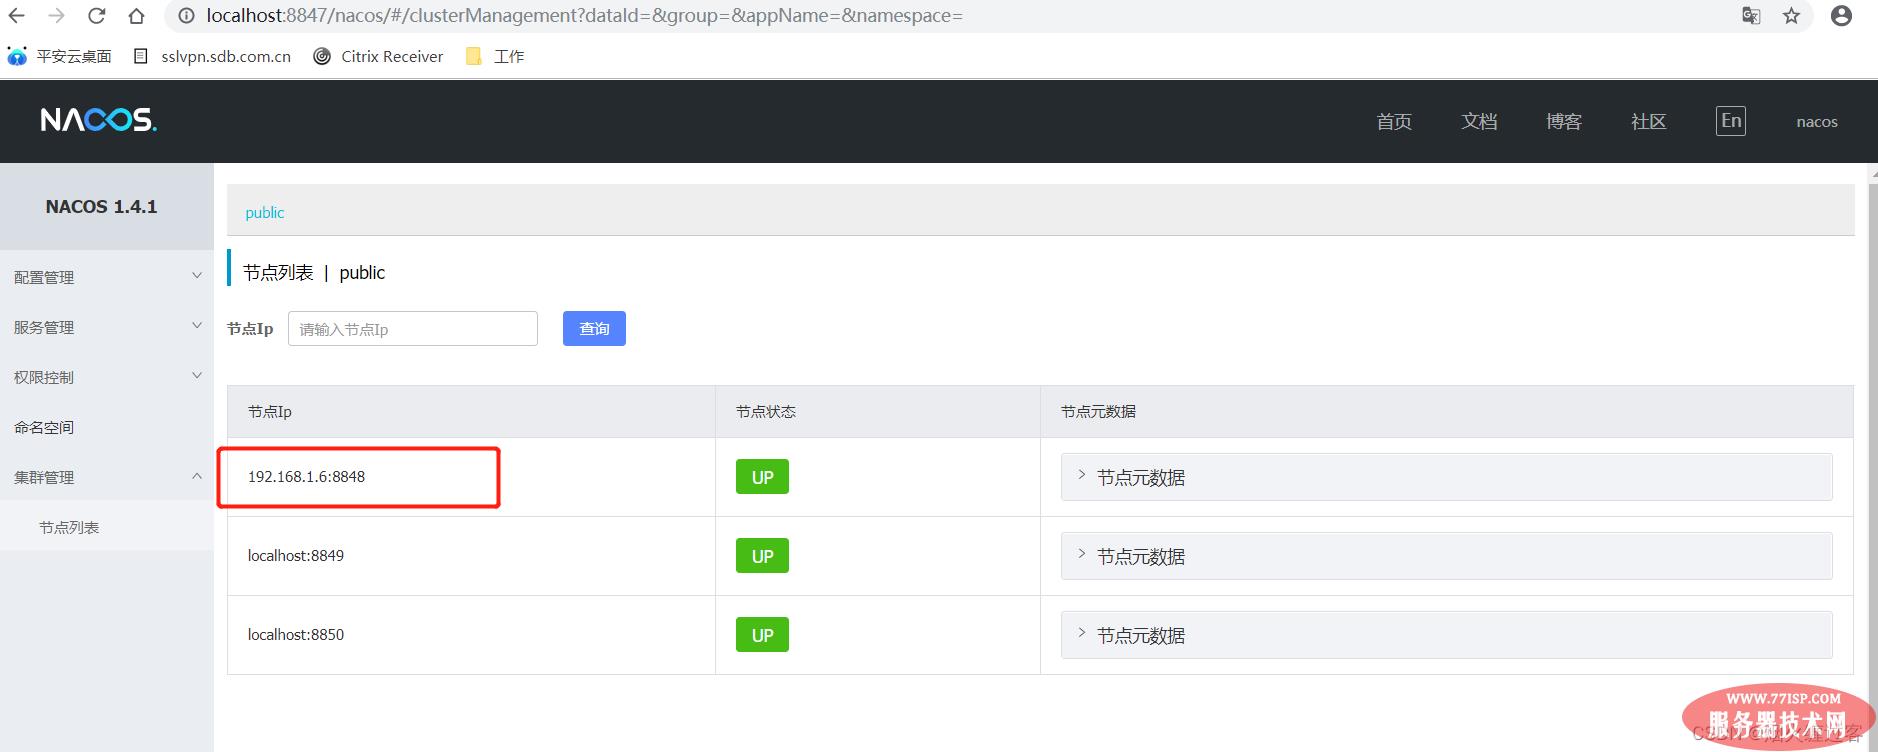
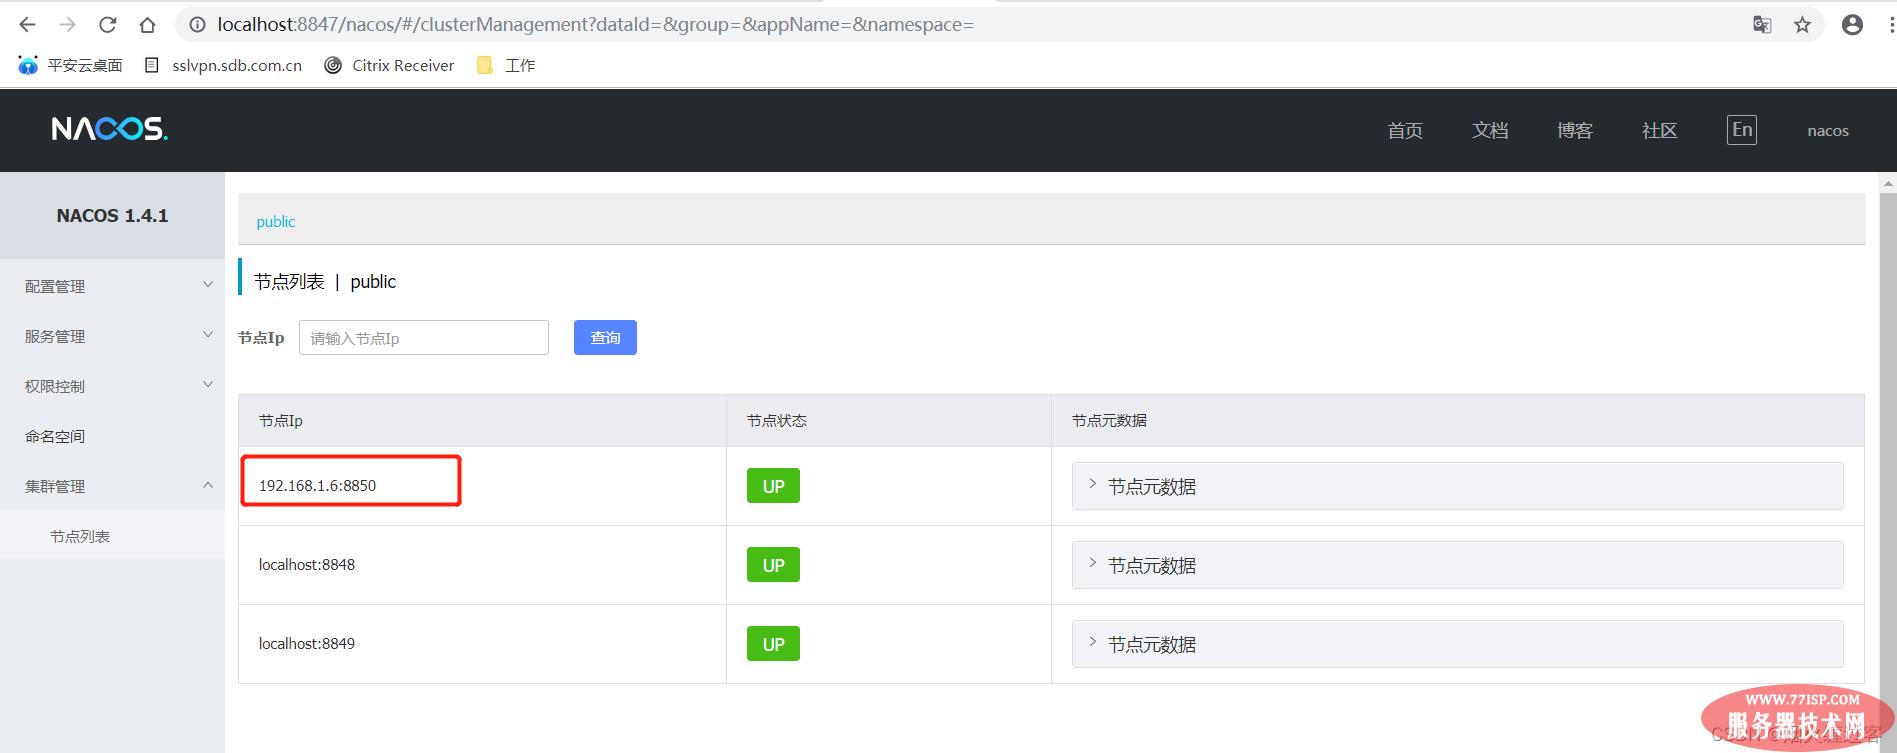
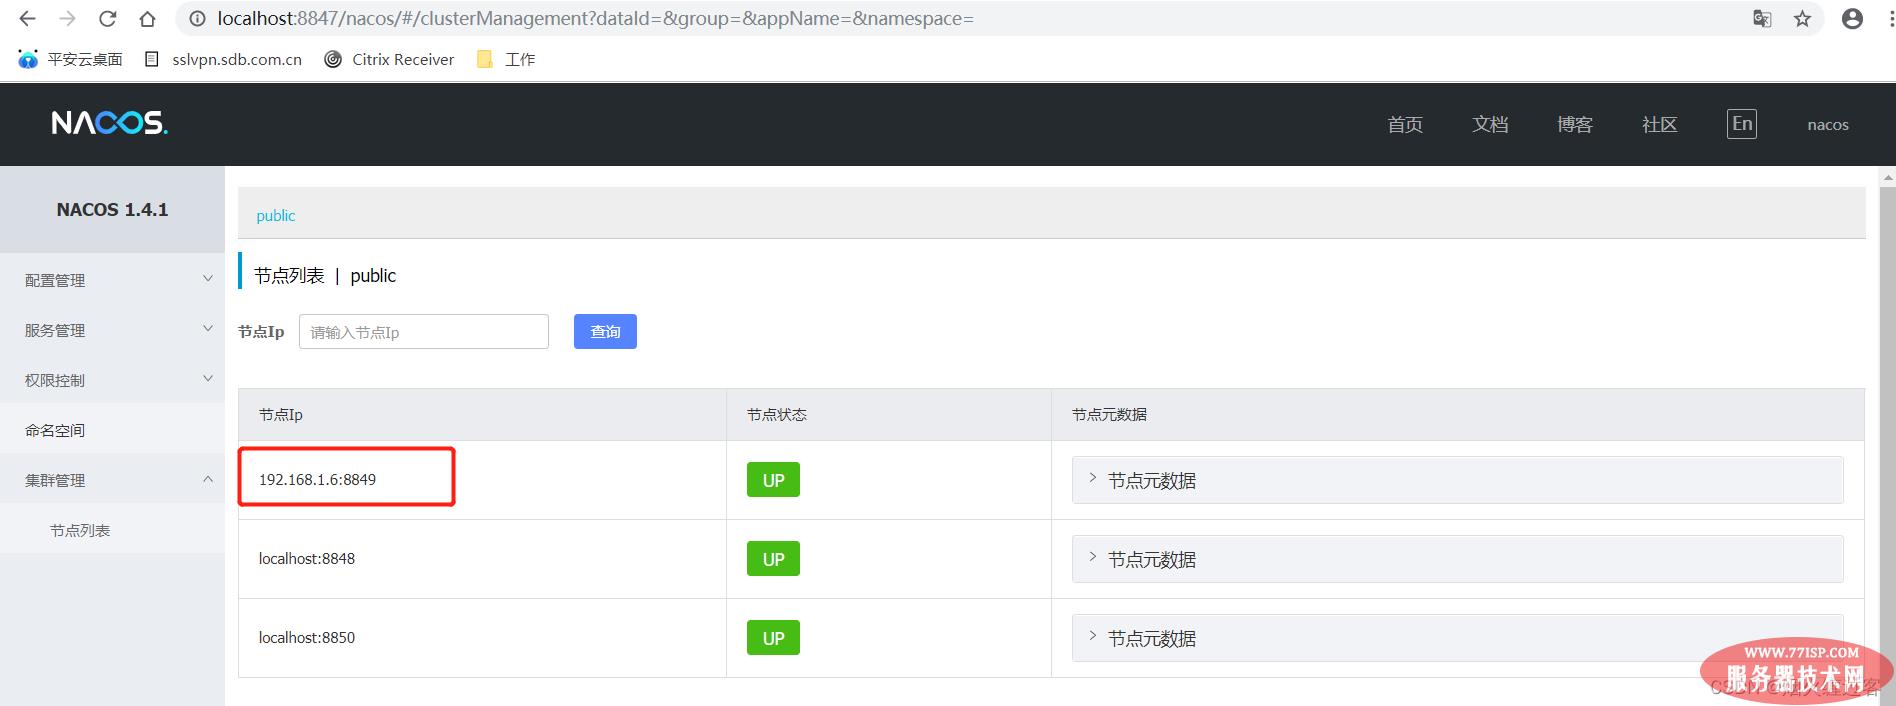
start nginx.exe我们监听的是8847端口,所以我们登录nacos直接使用nginx进行代理
http://localhost:8847/nacos
我们可以看到当你刷新的时候,分配到的是不同的服务器上
以上所述是小编给大家介绍的Nginx实现Nacos反向代理的项目实践,希望对大家有所帮助,如果大家有任何疑问请给我留言,小编会及时回复大家的。在此也非常感谢大家对77isp云服务器技术网的支持!
原文链接:https://77isp.com/post/15873.html
=========================================
https://77isp.com/ 为 “云服务器技术网” 唯一官方服务平台,请勿相信其他任何渠道。
数据库技术 2022-03-28
网站技术 2022-11-26
网站技术 2023-01-07
网站技术 2022-11-17
Windows相关 2022-02-23
网站技术 2023-01-14
Windows相关 2022-02-16
Windows相关 2022-02-16
Linux相关 2022-02-27
数据库技术 2022-02-20
抠敌 2023年10月23日
嚼餐 2023年10月23日
男忌 2023年10月22日
瓮仆 2023年10月22日
簿偌 2023年10月22日
扫码二维码
获取最新动态
